When identifying and valuing silver, a simple eraser may be one of the most important tools in your arsenal.
That’s right, you can use an eraser to test the authenticity of silver and determine its purity.
This method is known as the “eraser test,” and it is a quick and easy way to determine if a piece of silver is real or fake.
To test silver with an eraser, rub the eraser over the surface of the metal. If the metal is real silver, the eraser will leave behind a silver-colored mark, otherwise the eraser will leave a black mark indicating the silver is not pure.
The eraser test is based on the fact that silver is a very soft metal and can be easily scratched.
It is a great way to quickly check the authenticity of silver without damaging the piece or using any special equipment.
How to Test Silver With an Eraser?
The eraser test is a simple and easy way to test the authenticity of silver:
1. First, make sure the silver piece you are testing is clean and free of any dirt or debris. To perform the test, you will need a clean, unused eraser.
2. Next, rub the eraser gently over the surface of the metal. You should be able to see the eraser leave a mark on the metal.
If the metal is real silver, the eraser will leave behind a silver-colored mark. However, if the metal is not real silver, the eraser will leave behind a black mark.
This is because the eraser rubs off a thin layer of silver, revealing the underlying metal.
While performing the eraser test, the material is rubbing off a layer of alloy or another metal, revealing the underlying material is not silver.
It’s important to note that this method is a quick and easy way to check the authenticity of silver without damaging the piece or using any special equipment.
How Accurate is The Eraser Silver Test?
The eraser test is a relatively accurate method for testing the authenticity of silver.
However, it is only sometimes 100% accurate, and there are some limitations to keep in mind.
One limitation is that the test only determines if the metal is real silver, it doesn’t provide more information about the silver’s purity or quality.
Another area for improvement is that the test can be inconclusive if the metal is heavily tarnished or covered in a patina.
In these cases, the eraser may not remove enough of the surface to reveal the underlying metal.
Additionally, this test can also be inconclusive if the metal has been coated with a metal that is similar in color to silver.
The eraser may remove the coating and reveal the underlying metal, producing a false positive result.
Choosing The Right Eraser for Testing Silver
Many different types of erasers can be used for silver testing, but not all are equally suitable.
The most commonly used erasers for silver testing are rubber or plastic.
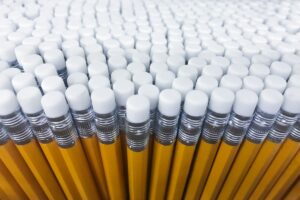
Rubber erasers, such as those found in pencil erasers, are the most popular choice because they are inexpensive, widely available, and easy to use.
They are also relatively soft, which makes them ideal for removing the thin layer of silver required for the test.
Another type of eraser that you can use for silver testing is a plastic eraser.
These erasers are typically more durable and long-lasting than rubber erasers. They are also less likely to crumble or produce dust, making them a better choice for testing larger or more delicate pieces of silver.
However, plastic erasers are generally harder than rubber erasers, which can make them less effective at removing the thin layer of silver required for the test.
Also, plastic erasers can be more expensive than rubber erasers.
It is important to note that other types of erasers, such as pencil erasers made of synthetic rubber, eraser pens, and eraser sticks, can also be used.
Still, they are not recommended as they are less effective than regular rubber erasers in removing a thin layer of silver.
Just make sure the eraser you chose is clean or new when carrying out the test to avoid scratching the silver.
Preparing The Silver Before Testing
In short, preparing the silver piece before testing includes the following:
- Removing any dirt, dust, or debris that may be present on the surface
- Removing any tarnish or patina that may be present on the surface of the silver
- Removing any coatings or finishes that may be present on the silver piece
- Making sure that the silver piece is completely dry before testing
- Making sure that the silver piece is free from any scratches or other types of damage before testing
- Make sure the eraser is clean and is ideally made of a soft rubber
Properly cleaning and preparing a silver piece before testing is crucial for accurate results.
The first step in cleaning and preparing the silver piece is to remove any dirt, dust, or debris that may be present on the surface.
You can do this by gently wiping the piece with a clean, soft cloth or using a gentle cleaning solution specifically designed for silver.
Next, it is important to remove any tarnish or patina that may be present on the surface of the silver.
Tarnish is a thin layer of corrosion that forms on the surface of silver over time and can affect the accuracy of the test.
Patina is a natural discoloration of silver that can also affect the accuracy of the test.
You can use a specialized tarnish remover, a cleaning solution specifically designed for silver, or a mixture of baking soda and water to remove tarnish and patina.
It is also essential to remove any coatings or finishes that may be present on the silver piece before testing.
Some silver pieces, such as those that have been electroplated or have had a protective coating applied, may have a surface layer that is not silver.
This layer can affect the accuracy of the test and should be removed before testing.
You must ensure that the silver piece is completely dry before testing. Any moisture or cleaning solution remaining on the surface can affect the accuracy of the test results.
Finally, it is vital to ensure that the silver piece is free from any scratches or other types of damage before testing, as it can also affect the results.


